

7 Bookshelf Styling Rules for Decor That Looks Collected
Last Updated: November 4, 2026
Quick Summary
Good bookshelf styling starts with what you already own, then adds only what fills a real gap. Measure each shelf, empty it completely, and sort items into books, decor you love, and a maybe pile before buying anything new. Build each shelf in three layers, vary height, and leave at least a hand's width of empty shelf at one end.
- Measure each shelf's height, depth, and width before buying a vase that will not fit.
- Stack three to five books horizontally, never more, and never place two horizontal stacks side by side.
- On each shelf include one tall piece, one medium piece, and one short piece.
- Photograph the unit straight on, then remove one item to check balance.
- Repeat one accent color two or three times across the shelves to tie the unit together.
Table of Contents
- Bookshelf Styling Starts With a Plan, Not a Shopping Trip
- How to Style Bookshelves With Lots of Books
- How to Style a Bookshelf Without Books
- Balance, Height, and Layering: The Rules That Hold It Together
- Top of Bookshelf Decor Ideas That Finish the Room
- Bookcase Decorating Ideas for the Living Room
- Build Your Shelf Story With Pieces You'll Keep
- Frequently Asked Questions
Bookshelf Styling Starts With a Plan, Not a Shopping Trip
Most people style a shelf by buying things first. That is backwards. Good bookshelf styling starts with what you already own, then adds only what fills a real gap.
Here is the core idea in one sentence: bookshelf styling is the practice of arranging books, objects, and art on open shelving so the display feels balanced, personal, and easy to live with.
The trick is a plan. You cannot style what you cannot see.
Measure, Empty, and Sort Before You Style
Start with three simple steps.
- Measure each shelf. Write down the height, depth, and width. This stops you from buying a vase that will not fit.
- Empty the shelves completely. All of them. A blank shelf shows you what you are working with.
- Sort into three piles: books, decor you love, and the maybe pile. Be honest about the maybe pile.
A common mistake is skipping the empty step. People shuffle items around a crowded shelf and wonder why nothing looks better.
Watch out: finish sorting before you buy anything new, so you do not end up buying duplicates of what you already own.
How to Style Bookshelves With Lots of Books
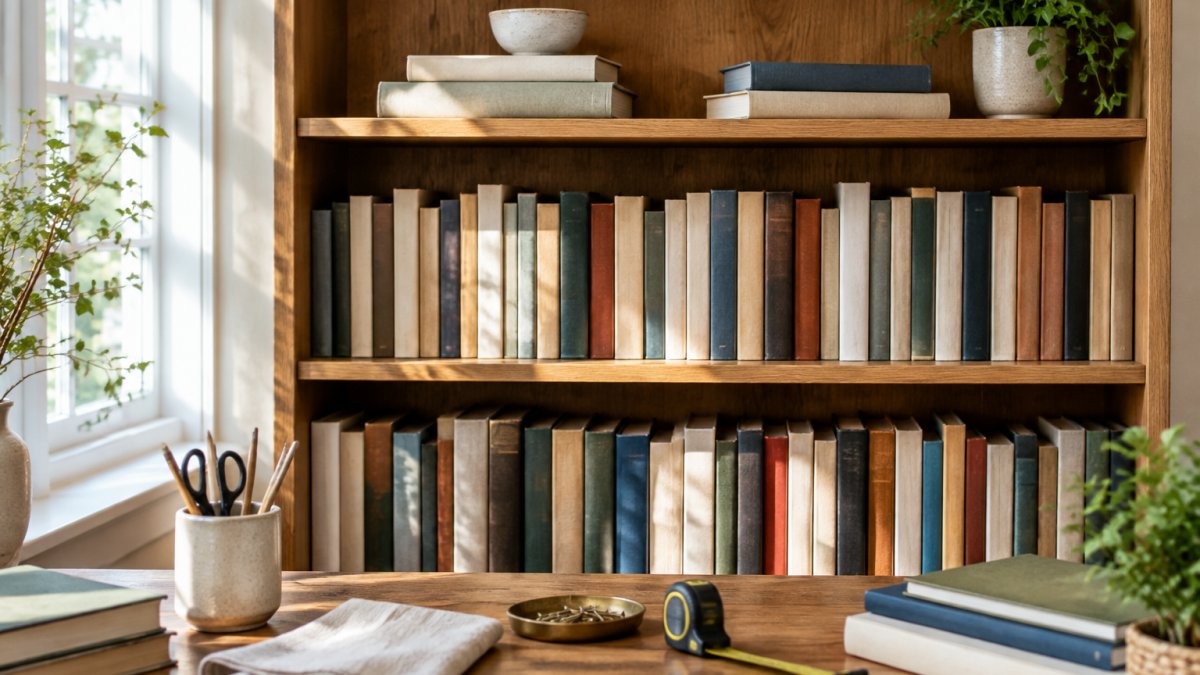
If books are the bulk of your collection, let them lead. Books are the strongest tool in bookshelf styling because they add color, height, and texture all at once. The goal is not to hide them. The goal is to shape them.
Vertical Rows, Horizontal Stacks, and When to Use Each
Use both, and alternate them.
- Vertical rows look tidy and let you read the spines. Use them as the base of the shelf.
- Horizontal stacks break up the rhythm. Stack three to five books, never more.
- Book stacking on top of a vertical row adds height without clutter.
A simple rule: never let two horizontal stacks sit side by side. Space them out.
Group books by color when you want a calm look. Group by subject when the books are ones you actually use.
How to Style a Bookshelf Without Books
No books? No problem. A shelf without books needs a clear organizing idea to avoid looking like a random collection. A helpful approach is to plan the whole unit as one composition, then adapt the plan to the shelf's actual dimensions.
Pick one theme and repeat it
Choose a single idea and carry it across every shelf: a collection (ceramic jars, vintage tins, small sculptures), a color story (all whites and warm woods, or a single accent repeated three times), or a material story (rattan, brass, and glass). Repetition is what makes an object-only shelf read as intentional rather than accidental. Three repeated elements, such as a color, a material, and a shape, can help tie a unit together.
Adapt the plan to the shelf you actually have
- Narrow shelves (under about 10 inches deep): work vertically. Lean one framed print against the back, place a single tall vase or branch bundle beside it, and add one small object in front. Avoid wide horizontal groupings that need depth to read.
- Deep shelves (12 inches or more): use the extra depth for layering. Put a large anchor piece at the back, a medium object in the middle ground, and a small piece at the front edge. This front-to-back layering is what gives deep built-ins their finished look.
- Built-ins with fixed shelves: treat each bay as its own vignette but repeat one element (a color or a material) across all bays so the wall reads as a whole. Vary the height of the tallest object from bay to bay to avoid a flat, repetitive line.
Build each shelf in three layers
Start at the back with a large, flat element, a framed print, a platter on a stand, or a tall plant. Add a medium object in the middle ground, then a small object at the front.
Watch out: do not place every object at the same distance from the shelf edge. A row of items lined up along the front edge reads as a store display, not a styled shelf.
Use height and negative space deliberately
On each shelf, include one tall piece, one medium piece, and one short piece. Leave at least a hand's width of empty shelf at one end. That breathing room is what separates a styled shelf from a crowded one, and it is especially important on object-only shelves where there are no book spines to provide visual rhythm.
If you want a single piece that fills a shelf on its own, a freestanding acrylic shelfie does the job. It stands without a frame and adds a personal, story-driven touch.
Match your approach to the shelf you actually have.
| Shelf type | Approach | Key detail |
|---|---|---|
| Narrow shelves (under about 10 inches deep) | Work vertically | Lean one framed print, add a tall vase, one small object |
| Deep shelves (12 inches or more) | Use extra depth for layering | Large anchor at back, medium in middle, small at front |
| Built-ins with fixed shelves | Treat each bay as its own vignette | Repeat one element across bays; vary tallest object height |
| Freestanding bookcases | Keep the back presentable | Leaning frame or plant fills the back |
Balance, Height, and Layering: The Rules That Hold It Together
These three rules do most of the visual work, but they only help if you know how to apply and check them. Get them right and almost any arrangement looks polished; get them wrong and even expensive decor looks off.
Height variation: create a staircase, not a fence
On each shelf, aim for three distinct heights: one tall piece (roughly two-thirds of the shelf's open height), one medium piece (about half), and one short piece (about one-third). The eye reads this as a gentle staircase. A shelf where every object is the same height reads as a fence, flat and stiff.
A practical check: step back about six feet and squint. If the tops of the objects on a shelf form a straight horizontal line, vary one of them.
White Cook & Book Acrylic Bookends →
Layering: build from back to front
Layering means placing objects at different depths, not just different heights. The reliable sequence is large and flat at the back, medium in the middle, small at the front.
Layering also applies to books: a small object placed on top of a horizontal stack, or a decorative piece set in front of a vertical row, adds depth without adding clutter.
Visual balance: distribute weight, not symmetry
Balance is about visual weight, not identical placement. A tall, dark object on the left can be balanced by a cluster of smaller, lighter objects on the right.
A repeatable process for checking balance:
- Photograph the unit straight on. A photo flattens the shelf and makes imbalances obvious.
- Look at the photo from arm's length. Note where your eye lands first, that is your heaviest visual weight.
- Check the opposite side. If one side of the unit feels empty in the photo, move one medium or large piece there.
- Remove one item. Most shelves are improved by taking something away; if the shelf still reads as complete, leave it out.
- Step back and repeat. Style, photograph, edit, and repeat until the unit reads as balanced from the room's main viewing angle.
Watch out: do not line up every object at the same height or the same depth.
Negative space matters too. Leave some empty shelf, at least a hand's width at one end of each shelf.
For height and layering, a large textured accent piece is a reliable anchor. If you want to mix styles without the mess, our guide on how to mix home decor styles without clutter goes deeper on balance.
Top of Bookshelf Decor Ideas That Finish the Room
The top of the bookcase is prime space. Most people ignore it, which is exactly why it is worth styling. Treat the top like a small stage.
Ideas that work:
- One large piece offset to one side, not centered.
- A tall plant or branches to draw the eye up.
- A framed photo or artwork leaning on the wall.
Keep it light. The top should finish the room, not crowd it. Two or three pieces is plenty.
Bookcase Decorating Ideas for the Living Room
A living room bookcase has to work harder than most. It holds the room together and gets seen every day.
Start with the pieces you use. Put the books you actually read at eye level. Save the top and bottom shelves for decor and storage.
Then repeat an accent color two or three times across the shelves. Maybe it is the blue in a frame, a jar, and a book spine. That repeat ties the whole unit together.
Add one personal piece: a photo, a keepsake, something with a story. For more cozy room ideas, see our guide on styling a cozy living room.
Build Your Shelf Story With Pieces You'll Keep
Here is the part most guides miss: a shelf you love is built over time, not in one afternoon. Buy pieces you will keep. Skip trends that will look dated by next season.
A repeatable plan helps. Use this as your checklist:
- Measure every shelf before buying anything
- Empty and sort into books, decor, and maybe
- Mix vertical rows with horizontal stacks
When you are ready to hold those rows and stacks in place, our white acrylic bookends turn a cookbook collection into a styled vignette. And if you want to add a piece with meaning, a freestanding acrylic shelfie fills an empty shelf with a story worth keeping.


Frequently Asked Questions
What is the bookshelf rule for making shelves look balanced?
The rule most stylists use is the rule of three: group objects in odd numbers and vary their height, shape, and scale across each shelf. Pair a tall item with a short stack and one small accent, then repeat that rhythm on the shelf below but flip the arrangement. Keep roughly one-third of each shelf open so the eye has somewhere to rest. Balance comes from distribution across the whole unit, not from making every shelf identical.
How do you style a bookshelf with lots of books without it looking cluttered?
Split your collection before you place a single book. Keep the ones you reread and reference, then store or donate the rest. Style the keepers in vertical rows with the spines facing out, break up long runs with a horizontal stack of three or four, and top each stack with one decorative piece. Grouping books by color or tone also calms a crowded shelf, because the eye reads blocks of color instead of individual spines.
What should I put on top of a tall bookcase?
Treat the top like a mantel: one large anchor piece, one medium item, and something with texture. A ceramic jar, a framed photo, a small plant, or a basket for storage all work. Keep the tallest piece toward one end rather than dead center, and leave space between objects so nothing touches. If the bookcase is below eye level, remember people see the top from above, so place the most interesting details where they're visible.
How can I style a bookcase in a living room on a budget?
Shop your own home first. Pull vases, baskets, framed photos, and candlesticks from other rooms and test them on the shelves before buying anything. Books you already own do most of the work. Add one or two new pieces that mean something, such as a hand-painted acrylic shelfie or a textured ginger jar, rather than a cart full of filler. A single considered object beats ten generic ones, and you can add more over time.
Building a shelf that feels collected, not decorated, takes a plan and a few pieces you truly love. Our House of Grace curates home and gift collections inspired by personal stories, with pieces chosen to bring warmth to everyday moments. Shop by the person you are gifting, or start with a single accent that anchors your shelf. Get started with Our House of Grace and build a display you will want to keep for years.
